


TranslatingWidelands
Translating Widelands
- Translating Widelands
- Becoming a Translator
- Editing Translations
- Coordinating and Reviewing Translations
- Finding your Way through the Project
- Translation Formats
- Keeping Consistency and Special Strings
- How to Deal with Changes in the Source Language
- Using an Offline Translation Tool
- Testing Your Translation
- Useful Links
We use Transifex to do our translation work, which is a specialized online platform. All translation work is done in your web browser and everybody can contribute translations in any language in seconds. However, you can also download the translation files and work in an offline tool if you prefer to work that way. Transifex also offers a Glossary function to help you keep consistency.
Becoming a Translator
If you are new to Widelands, we recommend that you play the game first. Have a look at the tutorials and at the campaigns for all three tribes and, if a (partial) translation is already available, play both in English and in your language. Check out our Downloads page to get a free copy of the game. Once you are familiar with Widelands, these are the steps you need to take:
- Visit our project on Transifex. You might need to get an account first.
- Don't panic about signing up for a 15 days free trial. You can choose to sign up for an open source account, which has no time limit.
- If your language is already on the list:
- Click on your language.
- Click on "Add Members" and invite yourself as a translator. This step is needed so you will receive important announcement about the project via Transifex.
- If nobody is translating into your language yet:
- Click on "Languages" in the left-hand menu.
- Click on the blue "Request language" button on the top right.
- Pick your language and then click "Request".
- Let us know, so we can add your language to the game.
We recommend that you take your time to become familiar with the structure of the project, and that you browse any existing translations and the glossary. If you should need further help or wish to discuss a term, please use our Translation & Internationalization Forum. You should also check if there are any special instructions for your language .
Once you have contributed a few translations, please contact a reviewer or coordinator, so we can add your name to the translator credits.
Editing Translations
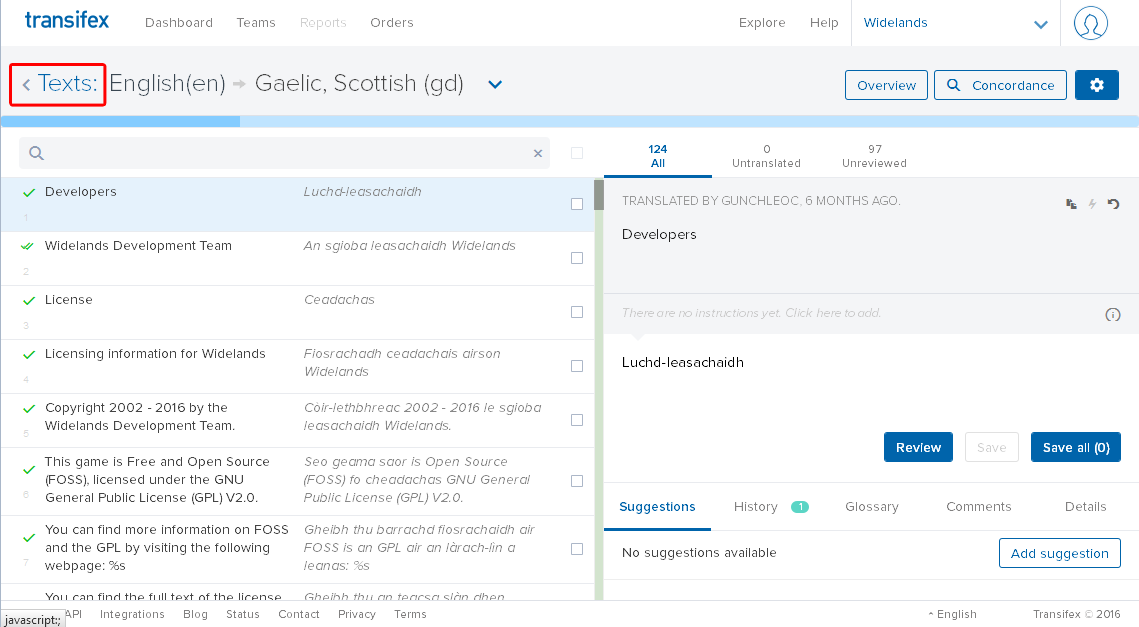
- On the Widelands Project Page, click on your language.
- Click on the resource that you wish to translate.
- Click on "Translate" for online translation, or "Download for use" for offline translation. You can also select "Download for translation", but this will lock the file for everybody else until you upload again. So, only choose this option if you are sure that you will be able to do the work.
- Type in your translation. You can get additional information on the bottom:
- Hit "Context" to access the developer comments.
- Find similar translations in the "Summary" tab.
- If a word in the English string has a dotted line underneath, check out the "Glossary" tab.
- For terms that are not in the glossary, you can use the "Concordance Search" to see if a term has already been translated.
- You can discuss your translation in the "Comments" tab. Add comments as issues if you want to get our attention. For more lengthy or general discussions, we recommend that you use our forums.
- Click the "Save Changes" button or hit the [TAB] key on your keyboard to save and move on to the next translation. [SHIFT+TAB] will save and move you back to the previous translation. Documentation for more keyboard shortcuts can be found at the gear icon on the top right.
- The search box above the list of translations has a lot of options, try them out!
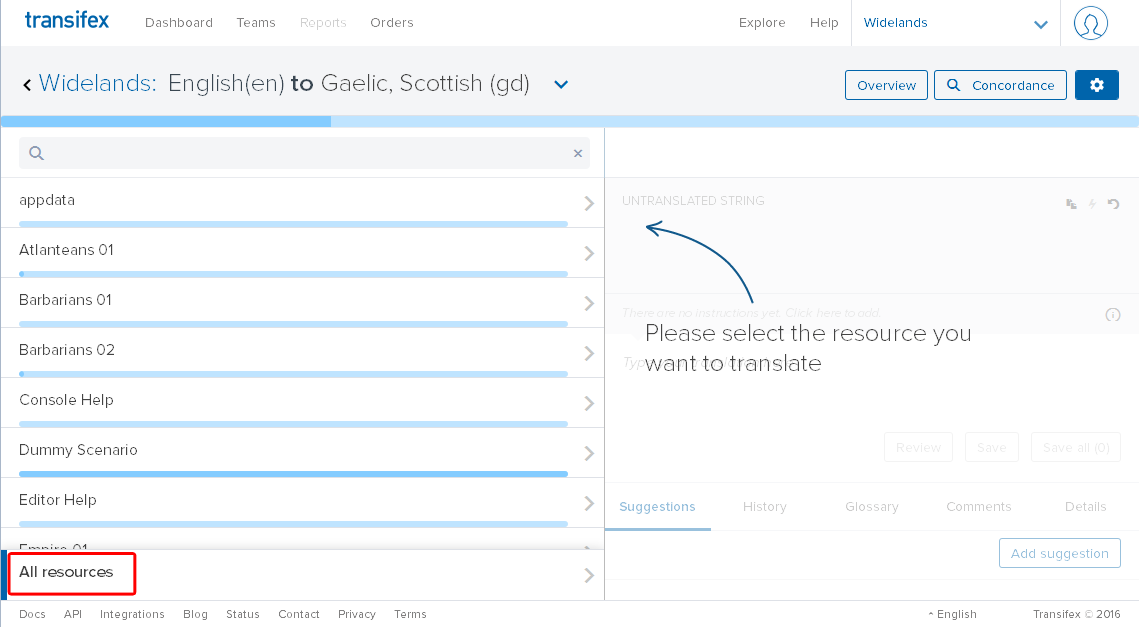
If you wish to see all strings at once, pick any resource and go into translation mode. Then click on the name of the resource on the top left:
And select "All Resources" on the bottom:
Transifex also offer a Guide for the translation interface, which describes an alternative method of accessing your translations.
Coordinating and Reviewing Translations
If you have a bigger team, you might find it useful to have somebody in charge of coordinating who will work on which file. Let us know if you wish to have a coordinator, and we will set things up for you.
We don't require translations to be reviewed before we will include them in Widelands. However, if you wish to use a review process in your translation team, please let us know and nominate the reviewers for your team. We will then grant them reviewer access. Reviewed strings can only be changed by translators with reviewer power.
Finding your Way through the Project
Where to Start Translating
We have assigned a category to all translation resources in Transifex. We recommend the following order of translation:
- “Widelands Main”
- Remaining GUI (except for “Text”)
- Tribes
- Tutorial
- Maps
- World
- “Text”
- Campaign
- Scenario
- Console
We also recommend that you make use of the Glossary function.
Matching the Resource to the .po Files in the Source Code
In some cases, you wish to find a specific string of text, either because it has not been translated yet, or you want to improve the current translation/fix a typo. The translation resources/templates are split up rather logically, so as long as you know where to look, you'll most likely find it. The following descriptions of the various templates are partially based on a question asked on Launchpad.
| Transifex Resource | Gettext Template / Path | Category | Description |
|---|---|---|---|
| appdata | debian/translations | - | Descriptions of Widelands used by Debian-based Software Centers. |
| Locale & Translators | data/i18n/locales | GUI configuration | Configuration for your language + translator credits. |
| Atlanteans , Barbarians , Empire * | scenario-* | Campaign | The history/dialog in the campaigns. They are numbered like the order they appear in, and identified by atl (atlantean), emp (empire) or bar (barbarian) prefix before the number. |
| Console Help | widelands-console | Console | Console/Command line messages shown when "widelands --help" is called. |
| Dummy Scenario | scenario-dummy.wmf | Scenario | The place holder map informing the player that no further maps/campaigns exists. |
| Editor Help | widelands_editor | Editor | Help strings that are shown in the editor only. |
| Map & Scenario Descriptions | maps | Maps | Names and descriptions of maps which are shown when selecting which map to play. |
| <Scenario Name> (Multiplayer) | mp-scenario-* | Scenario | Text used in the multiplayer scenarios, identifiable by name. |
| Texts | texts | GUI | Includes the README, credits, the hints shown when loading the game, and general help. |
| The Green Plateau (Single Player) | map-plateau.wmf | Scenario | The story for "The green plateau", a scenario. |
| Tribes | tribes | Tribes | Names and messages of wares, workers and buildings for all tribes. |
| Tribes Encyclopedia | tribes_encyclopedia | Tribes | Helptexts for all tribes. |
| Tutorial * | scenario-tutorial* | Tutorial | The tutorials available from the main menu |
| Widelands Main | widelands | GUI | Contains everything not covered elsewhere, including all menus, options, error messages, buttons, dialogs and other things in the game. If it is something which does not seem to fit in any of the other templates, it is most likely located here. |
| Win Conditions | win-conditions | GUI | Description of the various types of games and messages with "you have won/lost" |
| World | world | World | The trees, stones, creatures etc. on the map. |
Say for instance if you are playing the second mission in the Barbarian campaign and notice some typo in the story text. Then it would would make sense to search in Barbarians 02 or po/scenario_bar02.wmf, since this contains all translations for the second map in the Barbarian campaign.
Translation Formats
Plural forms
Our translation system (gettext) supports the use of proper plural forms. What do we mean by that? Let's take an example word - "cat". In English, we have:
- "0 cats", "1 cat", "2 cats", "3 cats", ...
This gives us a singular form for 1 and a plural form for all the rest, including 0. However, not all languages behave like this. For example in Scottish Gaelic, we have:
- "0 cat", "1 chat", "2 chat", "3 cait", ...
So, we have 4 different forms here! Therefore, gettext will present me with 4 different forms to translate for Scottish Gaelic, where there are only 2 in the English source language strings.
If you aren't sure which plural form is which for your language, check out the Localization Guide. Let's have a look at an example on how to read the rules there. First, look for your language's code. Let's say you're translating into Czech, this will be the rule for cs then:
nplurals=3; plural=(n==1) ? 0 : (n>=2 && n<=4) ? 1 : 2;
| Code | Meaning |
|---|---|
| nplurals=3 | This language has 3 plural forms |
| (n==1) ? 0 | The first form is for the number 1 (programmers like to count from 0 instead of from 1, so it has the ID 0) |
| : (n>=2 && n<=4) ? 1 | The second form (ID 1) is for the numbers 2 - 4 |
| : 2; | The third form (ID 2) is for all the rest |
If you need help with this, please don't hesitate to ask on the forum.
Place holders
If you come across weird codes like %s, %1$i or %3%, these are all place holders. They stand for other strings or numbers that will be filled in while running Widelands. This is what they mean:
%s: This place holder will be replaced by a string%i,%d: This place holder will be replaced by a number%u: This place holder will be replaced by a positive number or 0.
When there is more than one place holder in the same string, we have added numbers to them, so you can change the order to fit your language's word order. So, %1$i will still give you a number, for example. If you run across something like %3%, it simply doesn't tell you if it will be a string or a number, but this should be clear from context, or a comment provided.
To illustrate, here's an example from the Smugglers scenario:
The smuggling route worth %1$s from %2$s to %3$s has been broken!
will turn into:
The smuggling route worth 20 points from Player 1 to Player 2 has been broken!
If you translated this as:
The smuggling route to %3$s from %2$s has been broken, and it was worth %1$s!
you would get:
The smuggling route to Player 2 from Player 1 has been broken, and it was worth 20 points!
Keeping Consistency and Special Strings
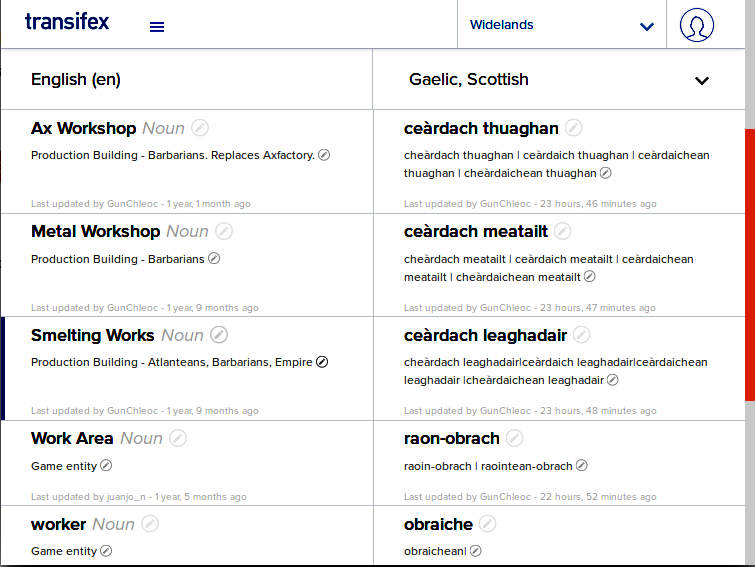
The Transifex Glossary
The Transifex Glossary will help you keep consistency with your translations.
Accessing the Glossary
Transifex offers a Glossary function, which we are using.
There are two ways to access the glossary on Transifex: Via the "Glossary" button on the Project Overview, or while translating - glossary items will be underlined with a dotted line, and the entry and a link displayed on the bottom.
See also the Transifex glossary guide
Creating new Terms
Only create a new term if it is a core term, e.g. a worker or building name, or a menu button. Make sure that you add a short, relevant comment to it for everybody, e.g. "Production Building - Atlanteans" or "GUI". Also make sure that the spelling is exactly as in the translation file, otherwise it won't get a dotted line in the translation interface.
If the new term you're adding replaces an older, obsolete term, DO NOT DELETE THE OLD TERM! Other translators or languages might still make use of their older translation to help them translate the new term. Document the change with a comment, like this:
| Old Term | New Term |
|---|---|
| Foo | Bar |
| OBSOLETE. Use Bar | Category X. Formerly Foo |
If it's only a spelling change, e.g. from Armour to Armor, just update the spelling.
Also make sure that you update the Terminology Correspondence Table in our Wiki.
Creating new Translations in the Glossary
Before you translate a glossary entry, please search the existing translations to check if it has already been translated. Before you add your translation to the glossary, make sure that a different term hasn't already been translated the same way.
Since searching the glossary is only possible for English, we recommend that you download the glossary for your language - this will give you a .csv file, which you can open with any spreadsheet software like LibreOffice Calc, Microsoft Office or Google Docs. Be aware though that you can't upload this again, so any changes will need to be done through the web interface.
You can use our language's comment field for any translation specific comments, e.g. grammatical information or documenting alternative translation ideas.
Changing existing Translations in the Glossary
Though it is technically a small step (edit the term), it may have huge effects on the translation already made! So please consider the following points:
- Is the change important? If not, it is not worth to change the work already made and to cause new work! New work, because every occurrence of the word in all the translation files will have to be changed, and Widelands is quite big. A meticulous update of translations will be necessary to save consistency in translation.
- Discuss your proposed change in the Translation & Internationalization Forum.
- If there is a consensus to change a translation, fix all translations first, then update the glossary. You can also leave a comment in the glossary to document the previous translation.
Automated Translation Checks and How to Prepare your Glossary
We will run automated translation checks on request. These will include general checks like punctuation, but also terminology checks using the Transifex glossary. We run these checks only occasionally, so please let us know when you want us to run them. You can access all translation checks on GitHUb.
In order to help you keep translation consistency, we will occasionally run a glossary check over your translations. This is nothing but a simple keyword check, so the check will return errors for translations that are rich in inflection, e.g. English "work", can be translated into German as "Arbeit", "arbeite", "arbeiten" etc, but the glossary can only list one of those terms. So, we decided to misuse Transifex' comment field for that - here's how you do it:
- When you get your first glossary check and if the file is big, don't check the translations yet - just fix up the Glossary. It is a better use of your time to check the translations themselves on the following round.
- Find the glossary entry for the term that was flagged, then enter the missing word forms in the glossary note for your language. Separate each entry by a
|. Put nothing else in the note field - If you only need to add 1 word form into the note field, add the
|anyway - it will tell our program that this is meant to be used in the glossary check. - You can use blank spaces around the
|to make the entries easier to read. - You can still use note fields for comments, as long as you don't add any
|to them.
Examples:
| Glossary Term | Glossary Translation | Glossary Note | Your Translations will be matched against |
|---|---|---|---|
| sheep | sheep | Nice, fluffy! |
'sheep' |
| ax | axe | axes |
'axe' |
| ax | axe | axes| |
'axe', 'axes' |
| click | click | clicking|clicked |
'click', 'clicking', 'clicked' |
| click | click | clicking | clicked |
'click', 'clicking', 'clicked' |
Production Program Messages
These messages appear when you hover your mouse over a building. Here are some examples:
Did not start brewing because the workers need no experience
Skipped working because the economy doesn’t need the ware ‘Iron’
Skipped upgrading soldier attack from level 1 to level 2 because 1x Broad Ax and 1x Fish or 1x Meat are missing
The messages are assembled in bits though the game’s logic, and the translations are fetched from two sources:
- General strings in
Widelands Mainwith placeholders in them. - Description strings of individual buildings’ production programs, wares and workers in the three
Tribes.
So, the challenge here is to fit all the parts together so they will work in your language. We tried to find something that will work for all languages, but if you can’t fit your language at all, please open a thread in the forum so we can discuss this and come up with a solution.
Part 1: Main Sentence
Now, let’s take this apart step by step - these are the main strings in Widelands Main:
- “Did not start %1$s because %2$s”
- “Completed %1$s because %2$s”
-
“Skipped %1$s because %2$s”
-
%1$scontains the description of a production program in the threeTribes. In our examples above, this would be “brewing”, “working”, and “upgrading soldier attack from level 1 to level 2”. %2$scontains the reason why this happens, and is explained below.
So, while translating these, make sure that they will fit with the reason clauses below. You can also reverse the order of %1$s and %2$s according to your language's syntax.
Part 2: Reason Clauses
The part after “because” can take both positive and negative forms. If your language has special forms for “because” depending on whether it’s positive or negative, remove it from the main sentences and add it to each clause here instead. The reason clauses take the following forms:
- ”the economy needs / doesn’t need the ware / worker ‘%s’”. In this sentence,
%sis filled in by a ware or worker name from the threeTribes. - “a worker needs experience” / “the workers need no experience”.
- “the building has / doesn’t have the following wares: %s”.
%sis a wares list as explained below. - “%s is / are missing”.
%sis a wares list as explained below.
Part 3: Wares List
The wares list is assembled as follows:
- In
Widelands Main, there is a string “%1$ix %2$s”.%1$iis replaced by a number, and%2$sby a ware name, so you get something like: “ 1x Water”, “ 3x Wheat” - If there is more than one ware type, a longer list is assembled automatically, resulting in something like “1x Water and 3x Wheat”.
Campaign Dialog
Some work in progress descriptions about the campaigns can be found on the GameContent Development page. They might help you find the tone for your characters.
Additional Instructions for Language Teams
Some teams have more instructions available for their specific language - please read them as well if your language is on the list. If there aren't any special instructions for your language yet, you are welcome to add some if you find them useful.
How to Deal with Changes in the Source Language
Because we're still in Alpha, it can happen that we need to break some of your translations. We keep track of changes to core terms in our Terminology Correspondence Table .
Sometimes, it is just a matter of a fixed typo, but the translation will be removed. Sometimes, we can have pretty big changes, although we do our best to avoid them. There are three ways to deal with this:
Using Transifex' Translation Memory
While translating, Transifex will show you similar strings that have been translated before. Check the "Suggestions" tab on the bottom left, below your translation. It has two interesting buttons: "Show difference with source" which will highlight the changes to the English source string, and "Use this" to copy the suggestion to your current translation, where you can edit it further as you see fit.
Using an Offline Translation Tool
You can also use an offline tool to translate, if you prefer this to using the Transifex interface - it is also possible to combine both methods. The two most common tools that we can recommend are Virtaal and Poedit. They both work fine - pick the one you prefer. You can also try Lokalize if you have KDE installed or don't mind installing its many libraries.
In order to translate a resource offline, click on the resource for your language and choose "Download for use". You can also select "Download for translation", but this will lock the file for everybody else until you upload again. So, only choose this option if you are sure that you will be able to do the work.
You can also use the Transifex command line client tx for downloading (tx pull) and uploading (tx push) translations. The project specific configuration (.tx/config) is included in the program source on GitHub.
Virtaal, PoEdit and Lokalize also come with a translation memory, which means that they will remember all the translations that you have saved, ever. So, if a file with a slightly changed source text comes along, the tool will show you a suggestion and also mark the differences. This is also convenient for translating strings that are similar - we have a number of those in the project, especially with the tribes. The tool will help you keep consistency with your translations and also reduce the amount typing that you need to do.
Lokalize also has support for glossary, filtering and project overview.
Accessing older versions of your translation on Launchpad
If you haven't been using an offline tool, you can still access previous versions of your translation. For this, you will need to
-
browse the revision history of the code.
-
Use the "<< Newer" / "Older >>" links on the bottom to navigate to a date, then click on the name of the revision you wish to access.
-
Click on "browse files at revision <number>"
-
In the "Filename" column, click on "po"
-
Select the translation template and then the file with your language code, e.g. "maps" and "de.po" for the German translation of the "maps" template.
-
If you don't fancy reading the source code version of the file, click "download file" on the top right. You will then need to get an offline translation tool like Virtaal and Poedit if you haven't already installed one.
Testing Your Translation
The easiest way to test your translation is to download and install a current development build . We do our best to regularly update the translations, so that what you see on screen will be pretty recent. If you wish to be really up to date, you can also compile Widelands yourself .
If you have just translated something and wish to test it instantly, you can download a .po file with the " Download for use" function from Transifex, turn it into an .mo file (the easiest way to do that is to save the .po file with PoEdit or export it with Virtaal), and drop it into the <...Widelands>/locale/<code>LC_MESSAGES folder. Make sure that the .mo file has the proper file name - if you're not sure, check out the de translation for examples and have a look at our translation file list .
If something you have translated doesn't fit on screen, please let us know so that we can give you more space. We recommend testing translations at the minimum screen resolution that the game offers.
For testing strings that are shown only under unusual circumstances, or for faster testing of difficult scenarios, you can use the hotkey Ctrl-Shift-Backspace to enable cheating mode. This allows you to change the amount of wares and workers in buildings for easier creation of complex setups for testing. The features unlocked by this hotkey are not compatible with replays and network games though, and it is only available in debug builds.
Useful Links
Transifex
Widelands
- Downloading Widelands
- Terminology Correspondence Table
- Translation & Internationalization Forum
- GameContent Development .